AVAIL 4.0
When you are ready to share your Channel with other users, there are two ways to get started.
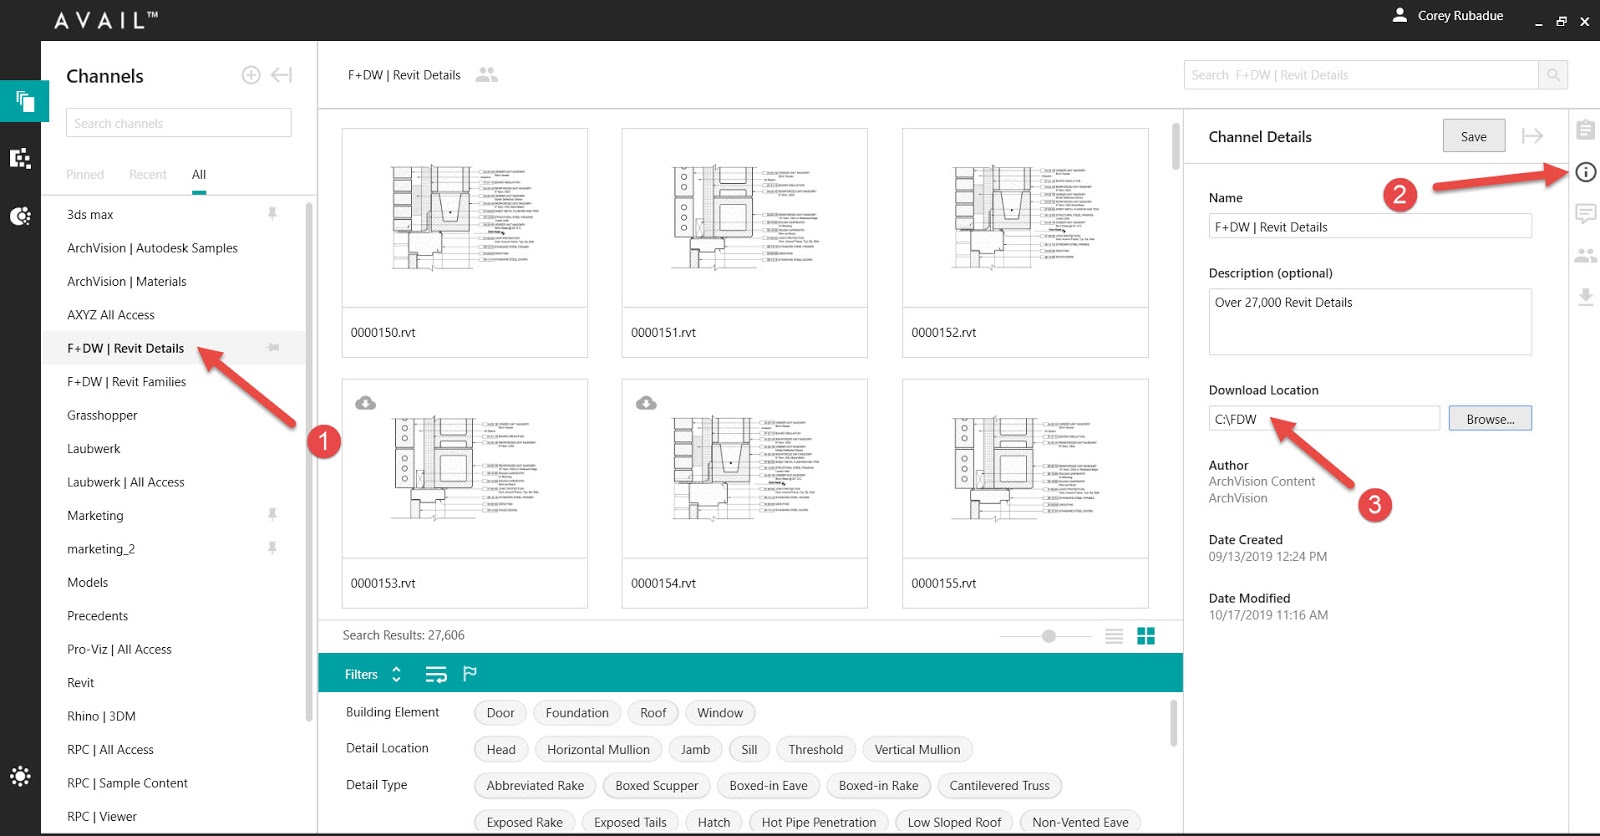
- From the AVAIL Home menu, right-click on the Channel Card and select View Channel Details. In the Channel Details Panel on the right, select Edit Shared Users.
- Or, in the Channel itself, hover over the right-hand side of the Publisher Bar and select the
 Shared Users icon.
This will take you to the Channel Members page.
Search for members on your team and select the ![]() to add them to your Channel.
to add them to your Channel.
Tip: Search for, and add, Everyone in My Plan to save time instead of adding members one by one.
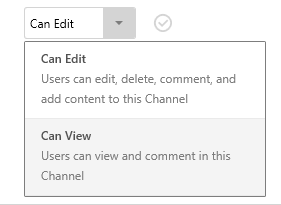
Adjust whether they Can View or Can Edit the from the dropdown.
The ![]() checkmark indicates that the user has been added to the Channel
checkmark indicates that the user has been added to the Channel
If you need to remove a user from a Channel, hover over the ![]() checkmark and select the
checkmark and select the ![]() Remove User icon.
Remove User icon.
Last but not least, be sure to select Save and Close, to save any changes that have been made. An email notification will go to the users to let them know they have been added to the Channel!
Sharing lots of Channels and don't want to inundate users with email notifications? The plan Admin can disable the Channel Share Email Notification by going to the Manage Portal, under the Settings tab.
AVAIL 3.0
As an AVAIL publisher, in AVAIL Desktop:
- Select the Channel you wish to share with your teammates.
- Select Channel Details.
- Set the download location to a location that makes sense to your company. Ideally, this would be a shared location so that you only have to download the content once.
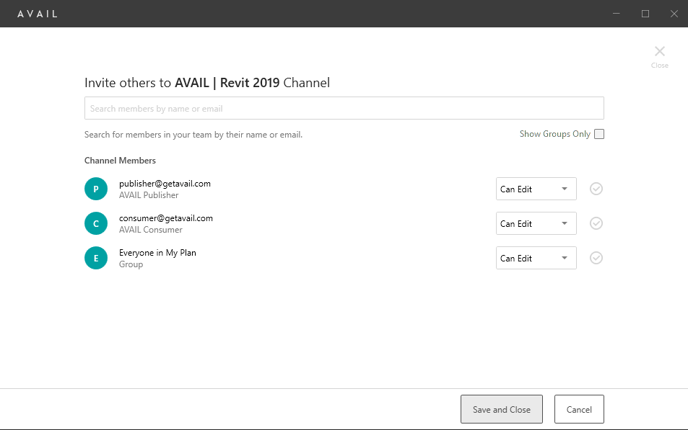
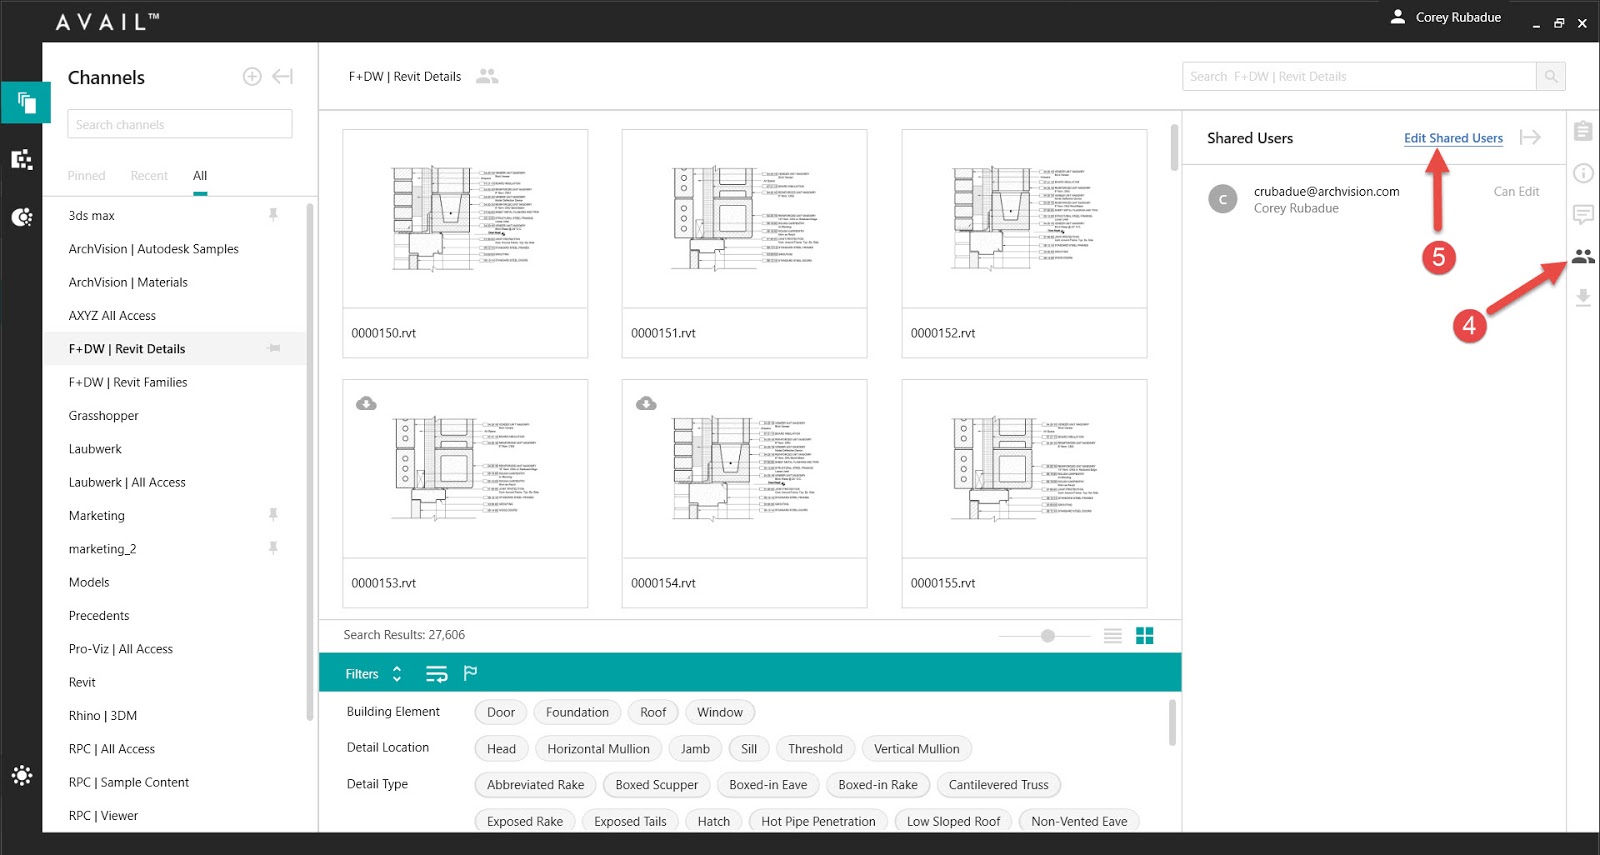
4. Select Shared Users.
5. Click on Edit Shared Users.
6. If you want to share with everyone on your AVAIL Team then you can enter "Everyone" here and proceed. Otherwise, enter the email address of the person in your company that you want to share the channel with.
7. Choose Add A New Member.
8. Make sure the user has editing permissions.
9. Select Add Invitations.
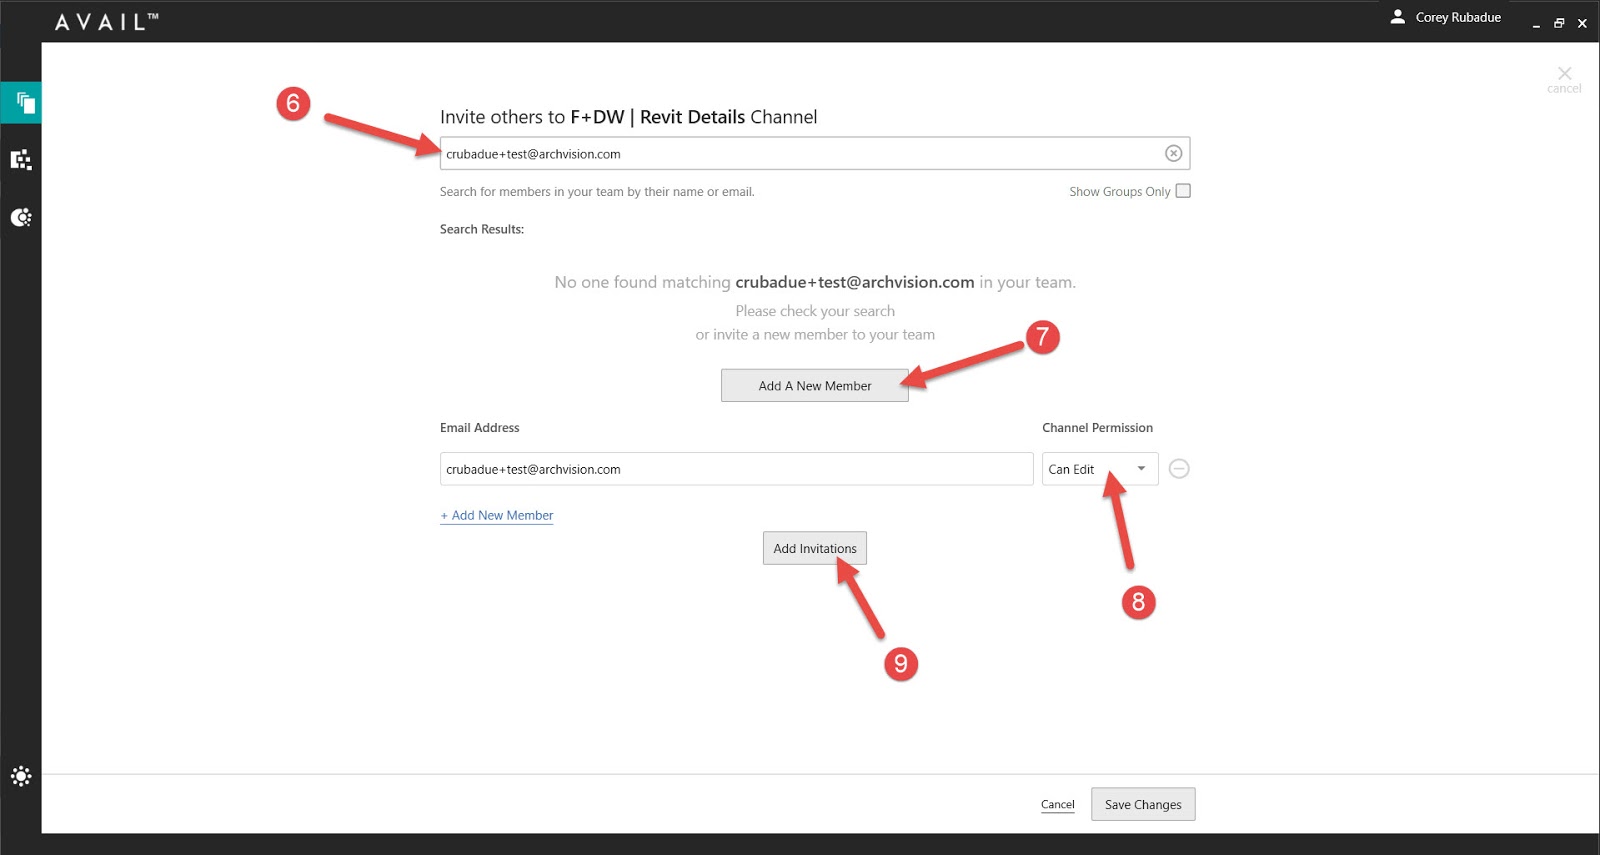
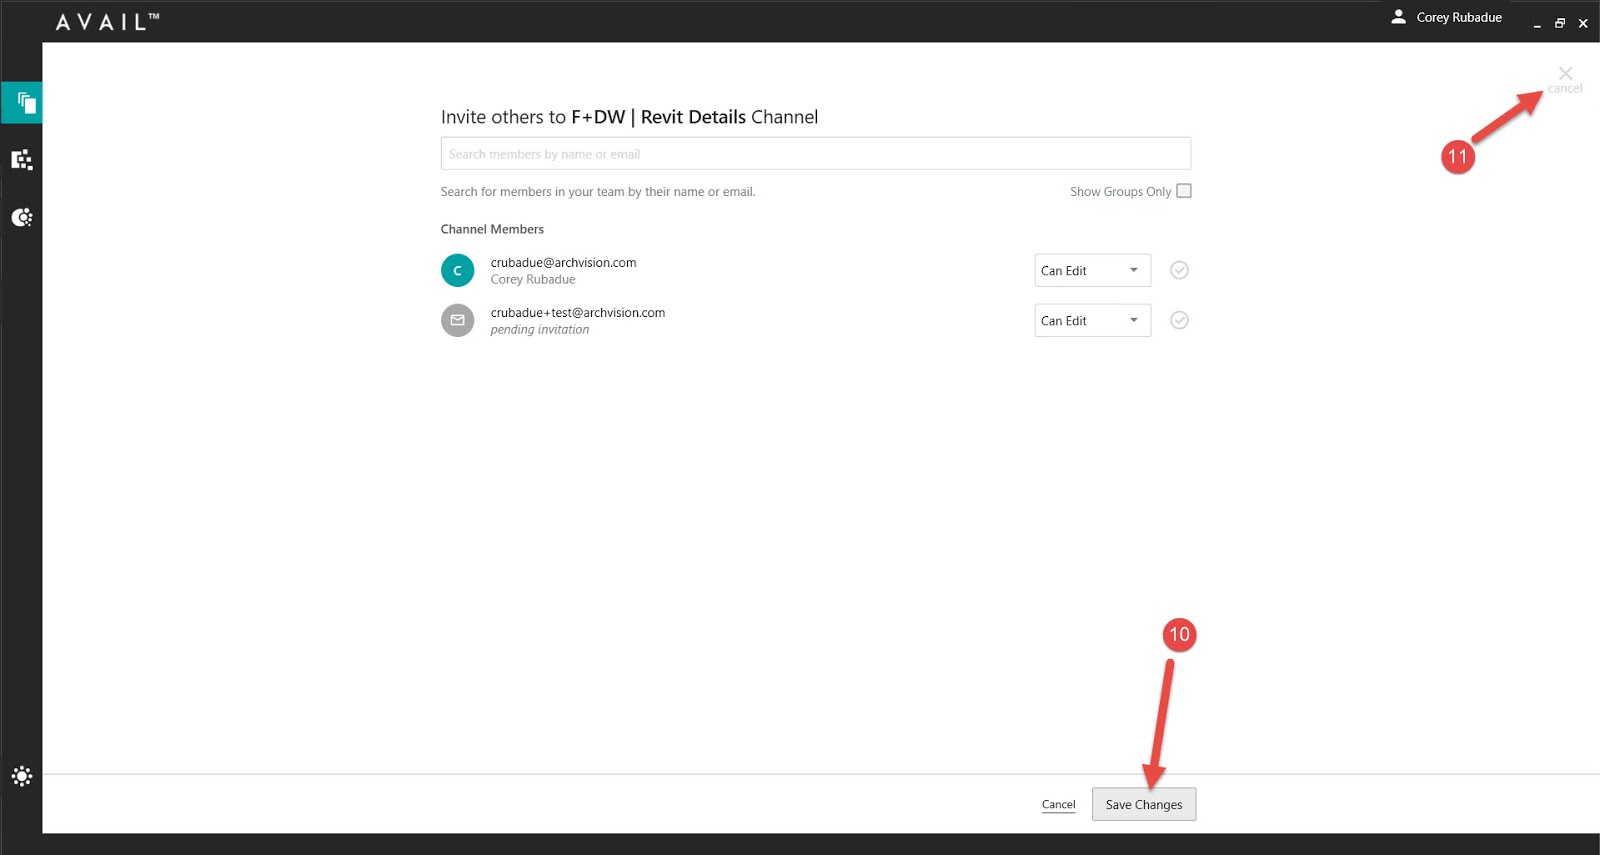
10. Save your changes.
11. Select cancel to get back to the previous screen.