This quick guide will walked you through the basics steps to start using the RPC technology and content with Adobe Photoshop.
**NOTE: Adobe Photoshop DOES NOT required any additional software or plugins to be able to work with RPC Technology and Content.
------------------------------------------------------------------------------------------------------------------------------
Quick Start
1. Open the ArchVision Dashboard.
The RPC workflow requires the Dashboard to be up and running BEFORE start your design software.
For more information about how to use the Dashboard please visit the Dashboard quick start Documentation.
2. Explore and Download the RPC Content
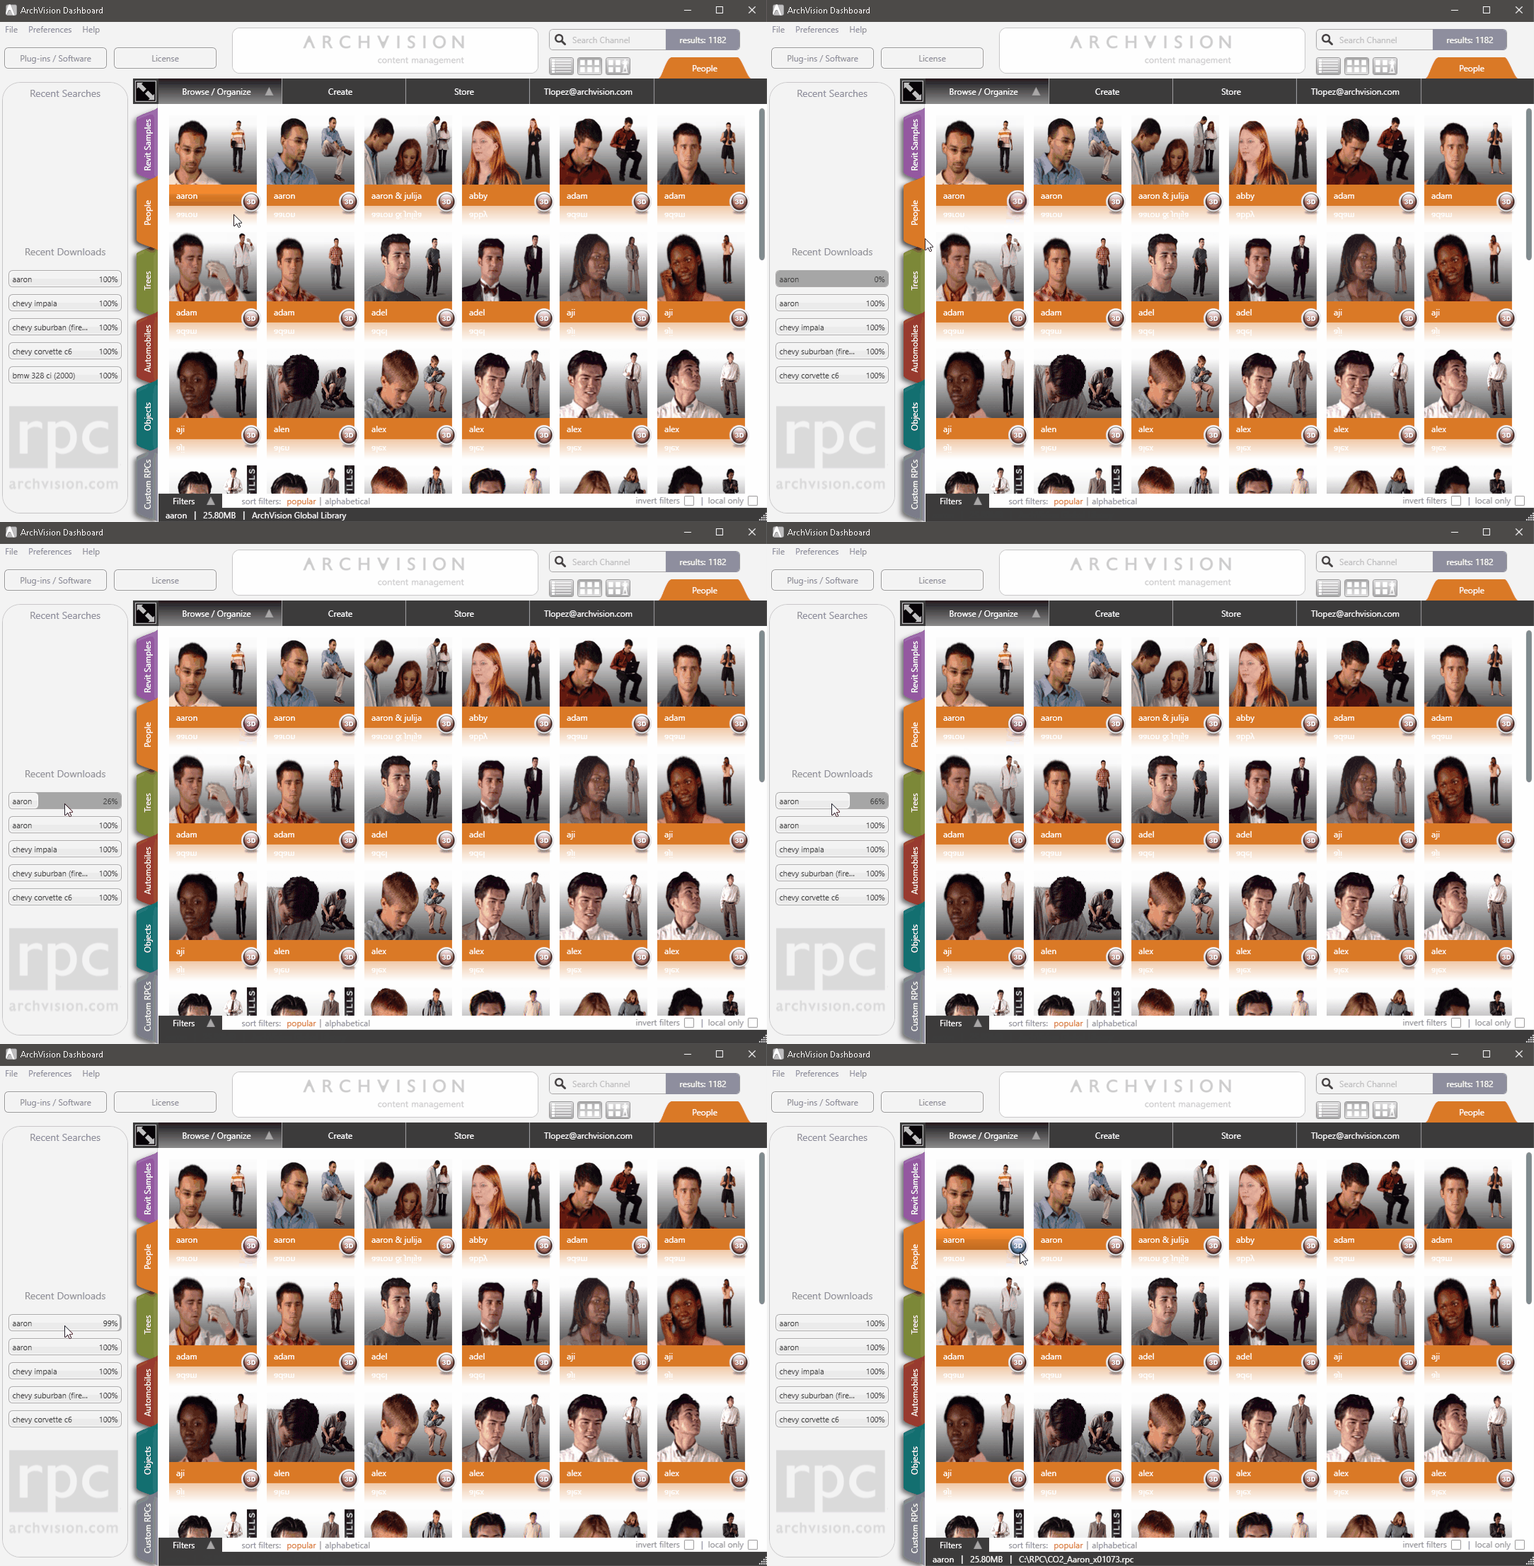
From the Category Tabs, select the you prefer category to explore and download the RPC Content.
To Download the RPC content Click on the Thumbnail's red icon. A download bar will appear in the the left panel area. Once downloaded, the icon should turn
'blue'.
*Content with a BLUE ICON, is ready to use for rendering and then you will be able to drag&drop into your canvas.


3. Add RPC Content to your PHOTOSHOP CANVAS.
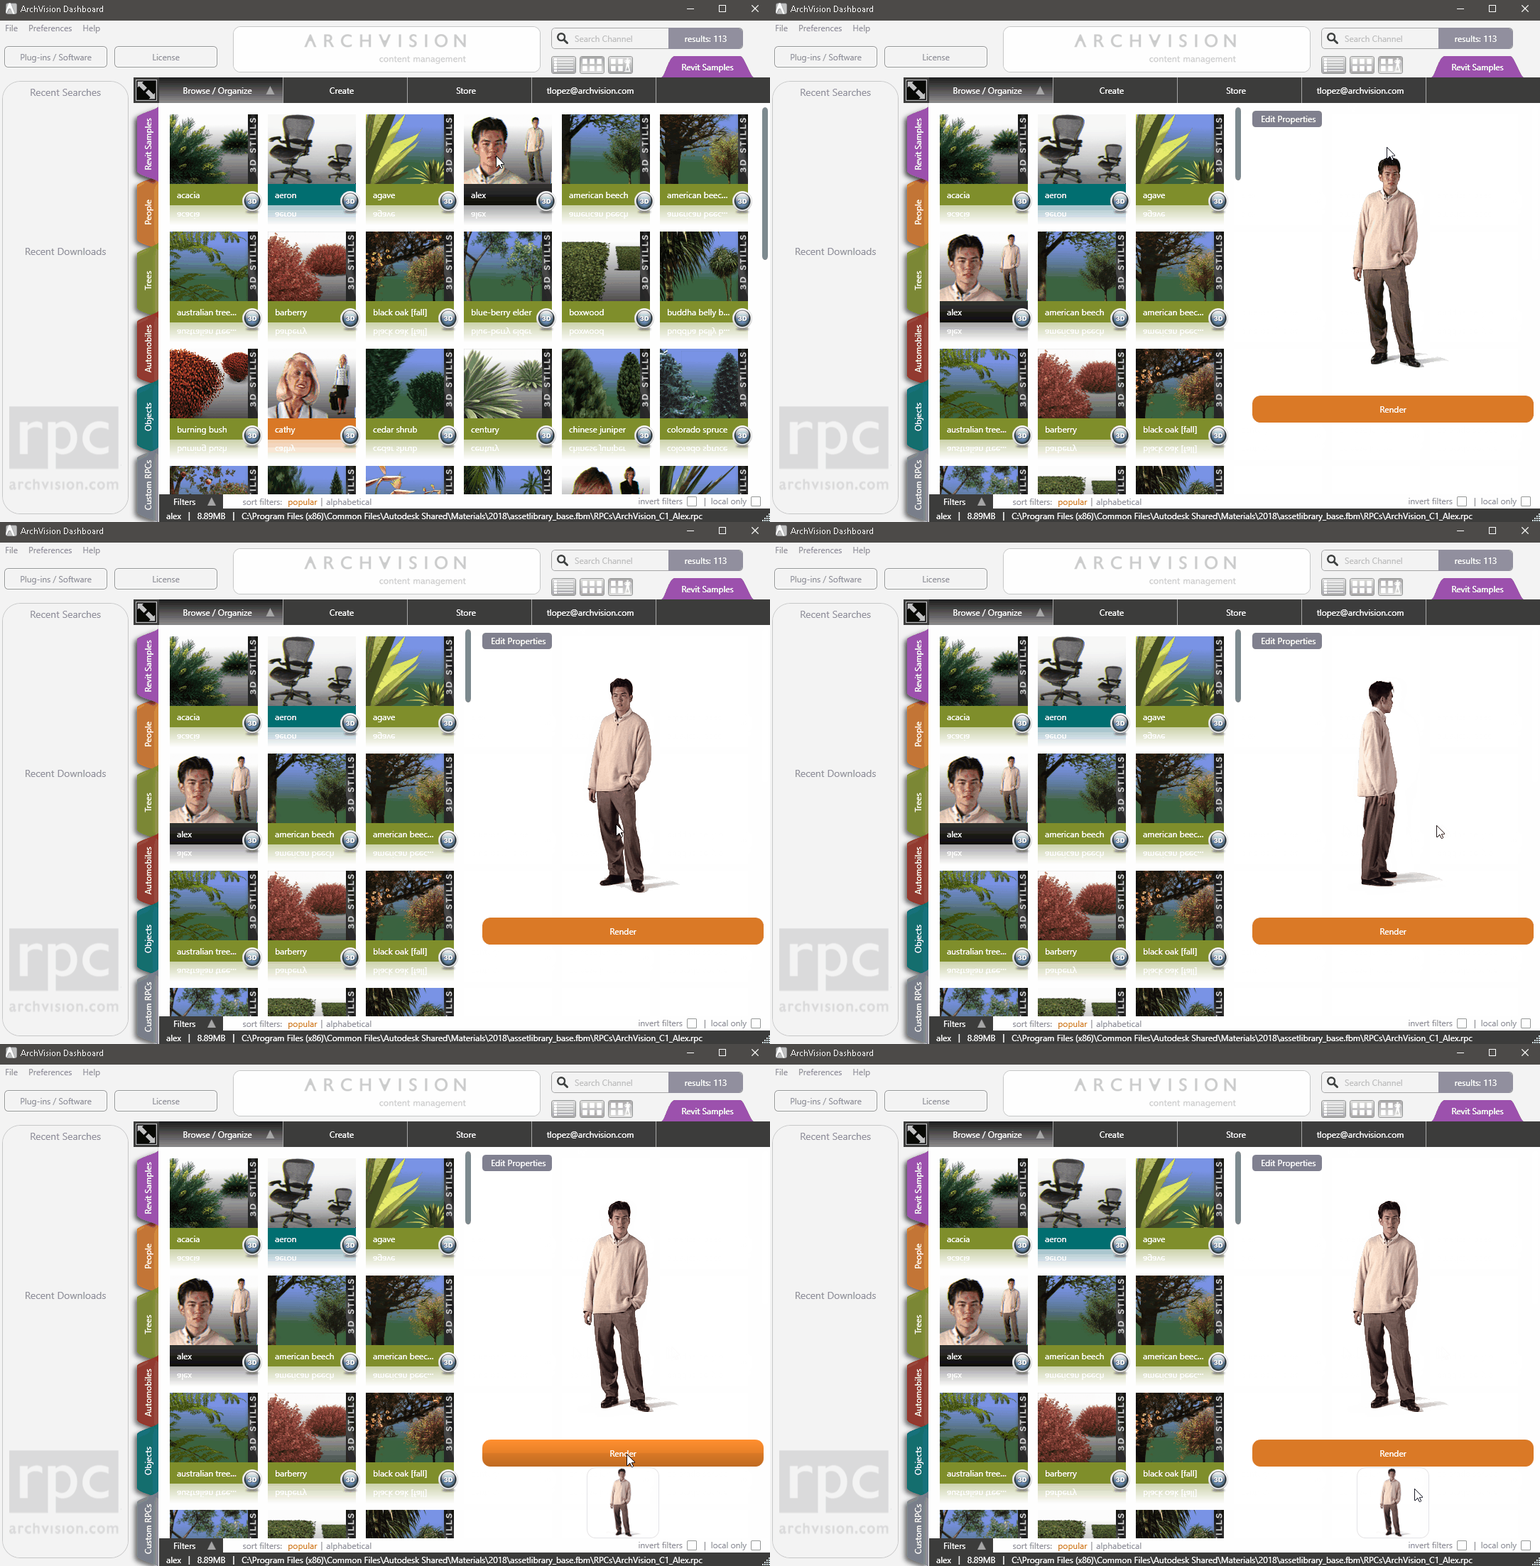
Active the Dashboard 3D viewer then select the RPC you want to add to see the a
preview of the RPC next select the desired view and click the "Render" button.

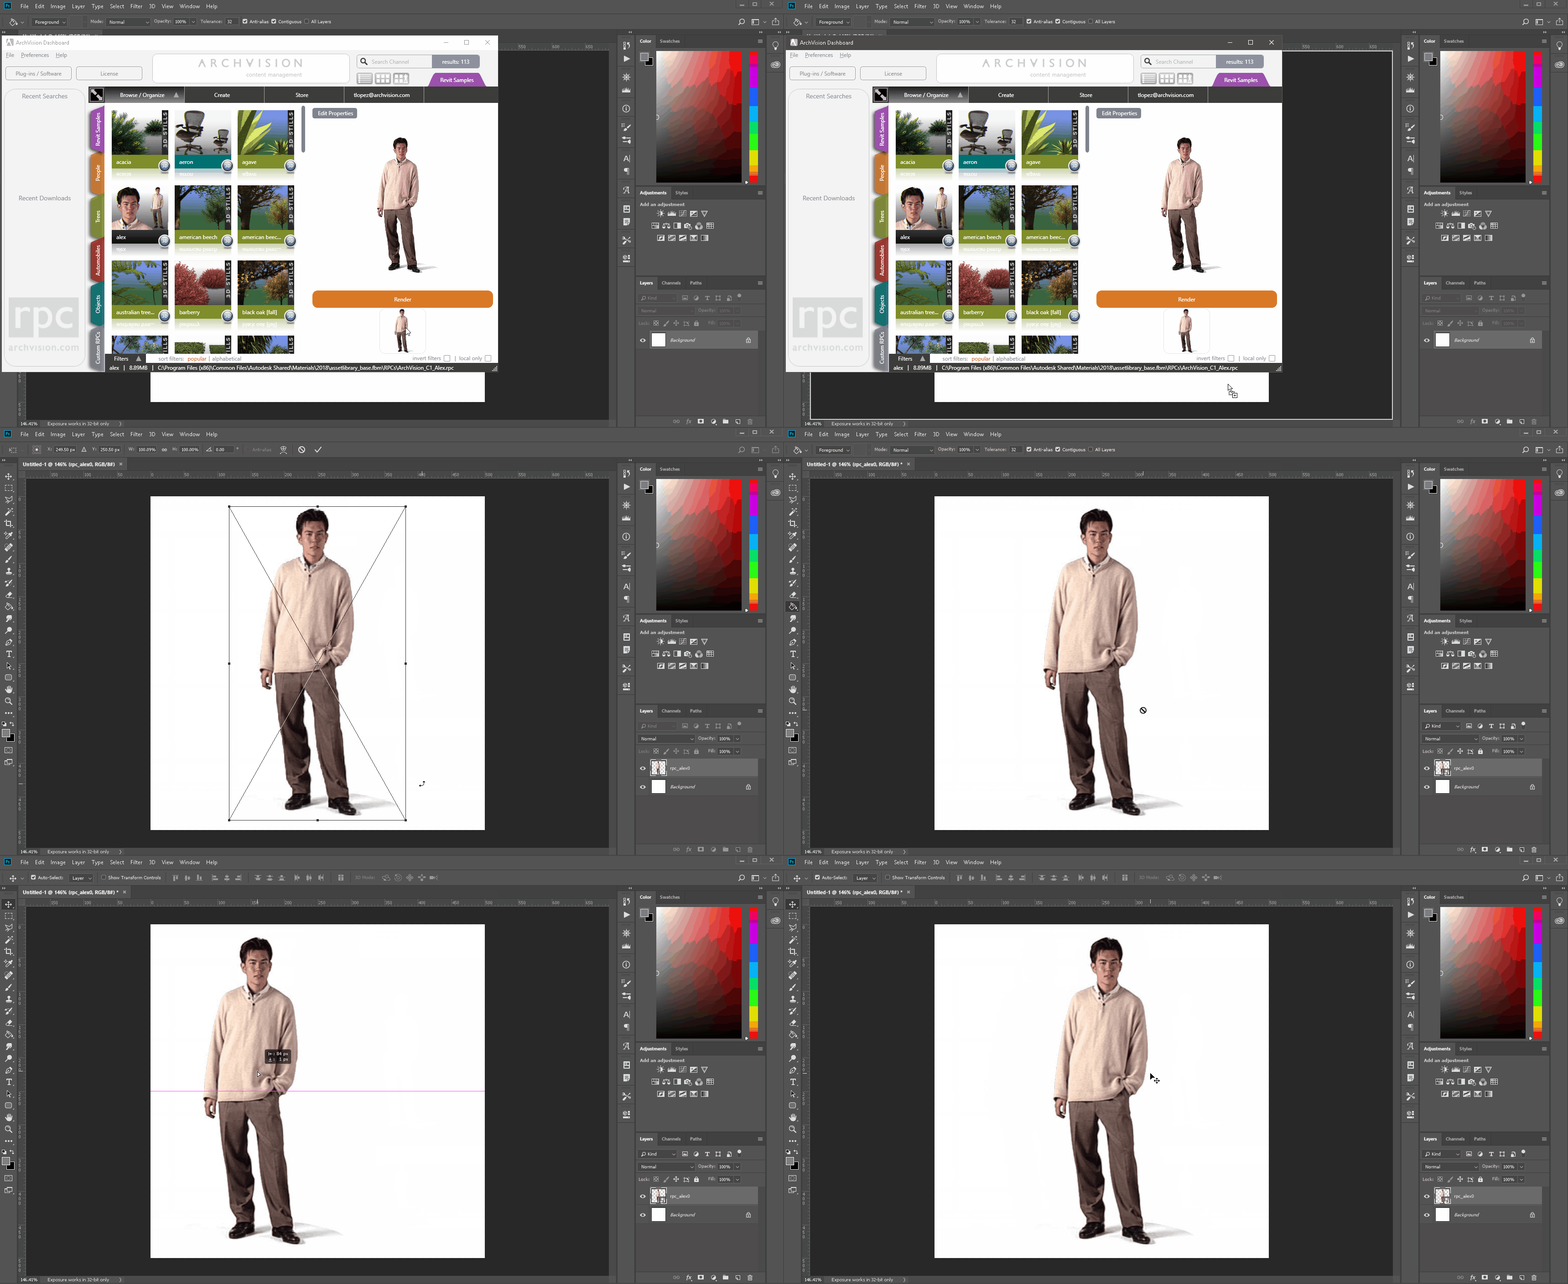
Once you rendered, just click over the small Render Preview and then just
drag&drop it into your Photoshop Canvas.

ALRIGHT!! The RPC content is now available to use as a layer inside your Photoshop project
