Introduction:
We have extended our RPC ecosystem to support RPCs in Enscape for Revit. In Revit when you place an RPC in Revit there is an Enscape asset that is created. The RPC and the custom Enscape asset are linked by the EnscapeAssetId Type Property of the RPC family.
Requirements:
- Enscape must be installed for Revit on the same system as your ArchVision RPC plugin.
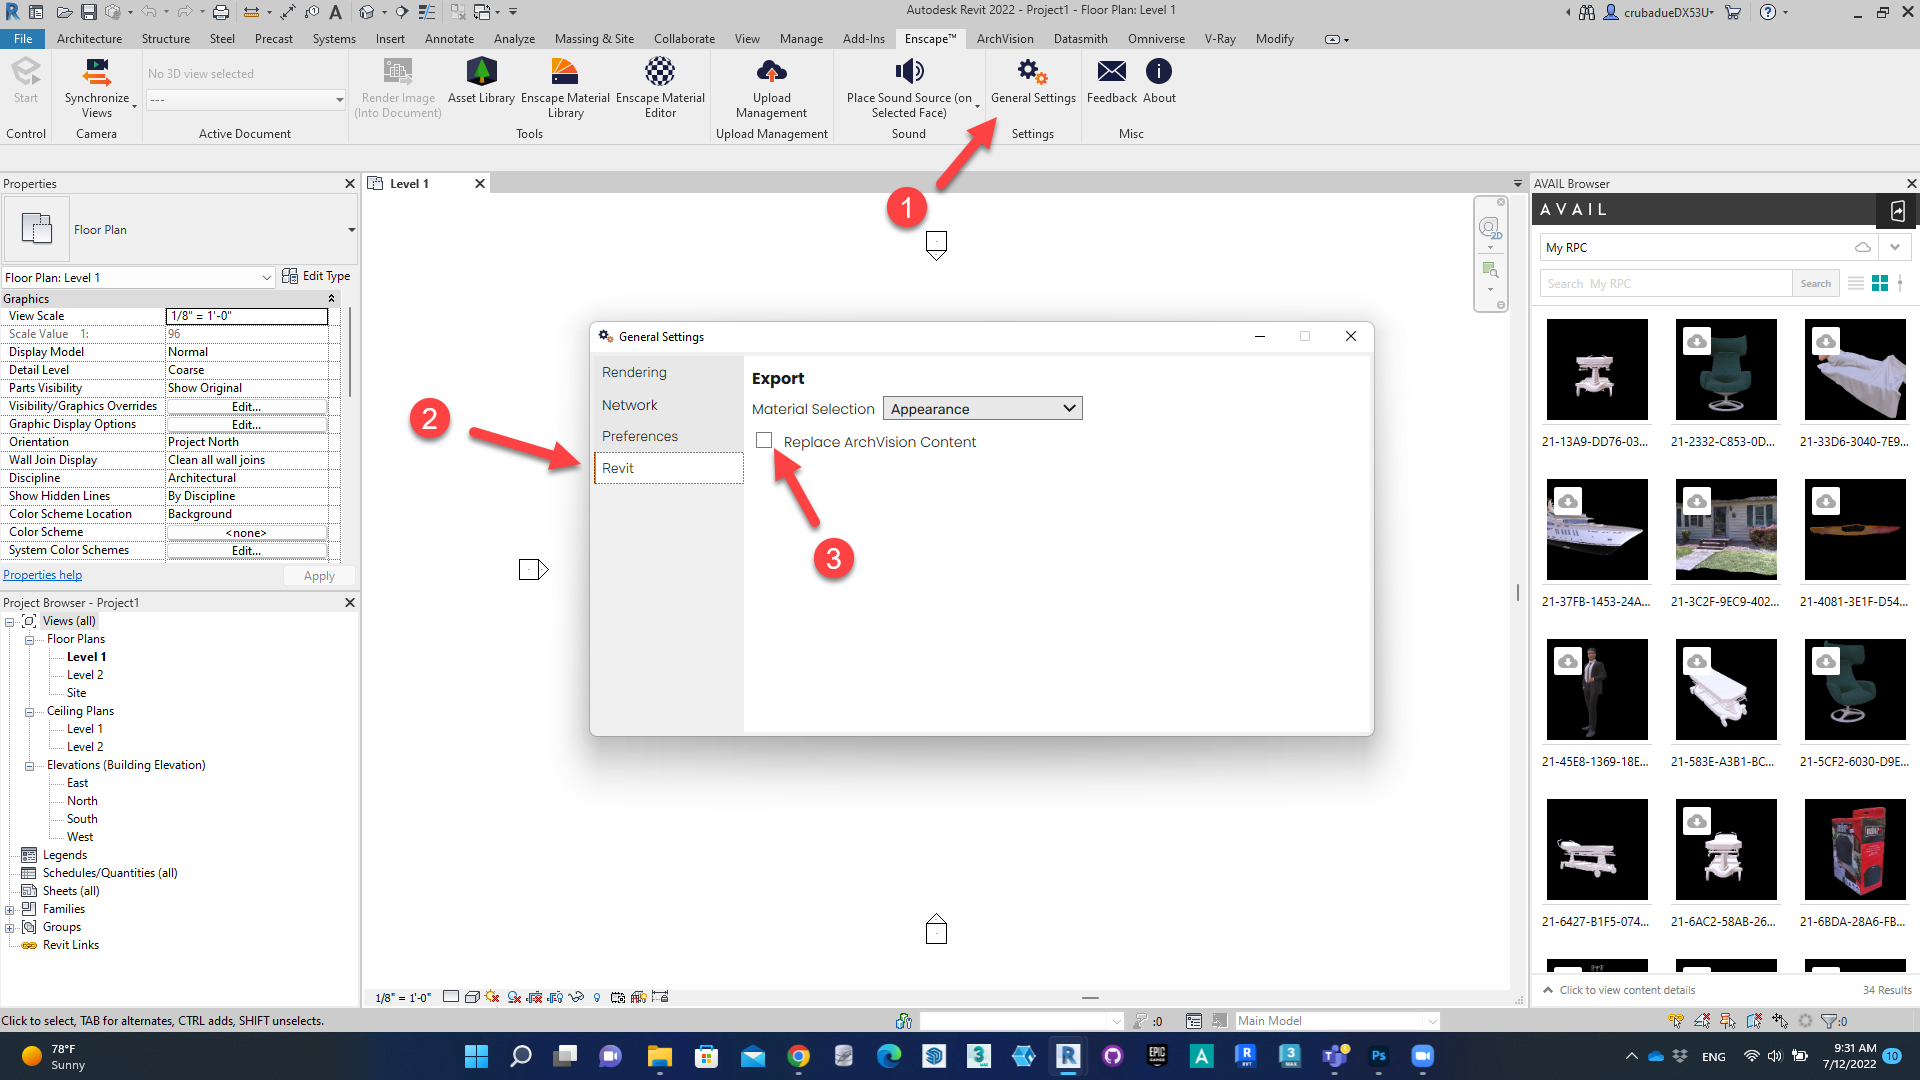
- Disable Replace ArchVision Content in the Enscape export settings. To do this open the Enscape tab in Revit, select General Settings, and then select the Revit tab and disable Replace ArchVision Content.
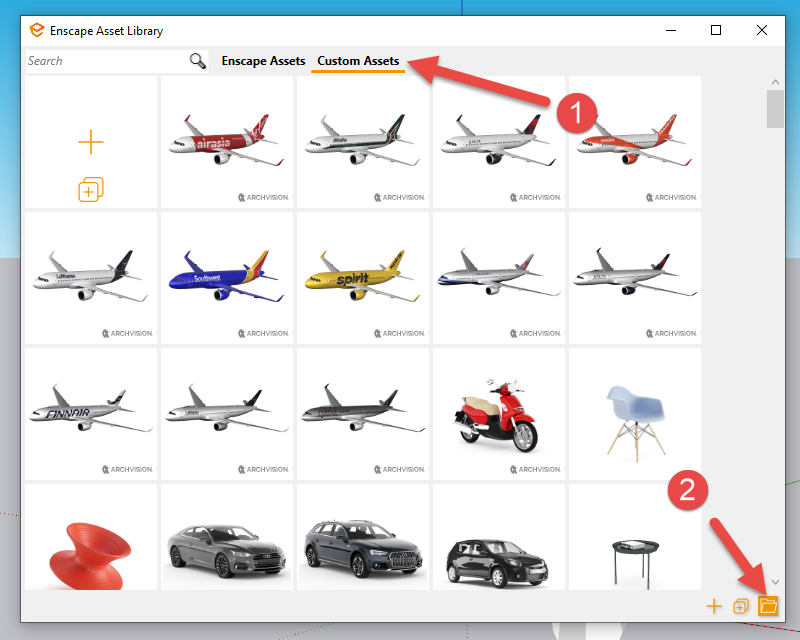
- Your Enscape custom asset Source Path must be set. To do this open the Enscape Asset Library, select the Custom Assets tab, and then select Source Path.
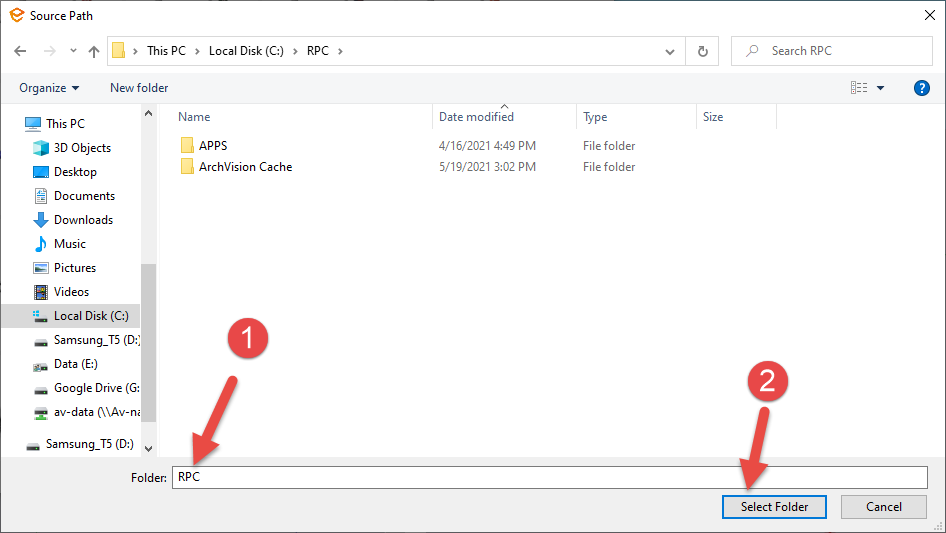
In the Source Path window navigate to the path where you want the custom assets to be cached and then choose Select Folder.
Note: The custom assets that are linked to the RPC are stored on a per session basis. When you close Revit the cached custom assets will be deleted. The next time the Revit file is opened the custom assets will be rebuilt.