This quick guide will walk you through the basic steps to start using RPC plugin and content with SketchUp Software.
***Make sure you have installed the required software and plugins. For more information please visit the "Getting Started with ArchVision" documentation.
*** RPC For SketchUp plugin is compatible ONLY with V-Ray engine as at the moment.
- Access the RPC Content Manager "AVAIL"
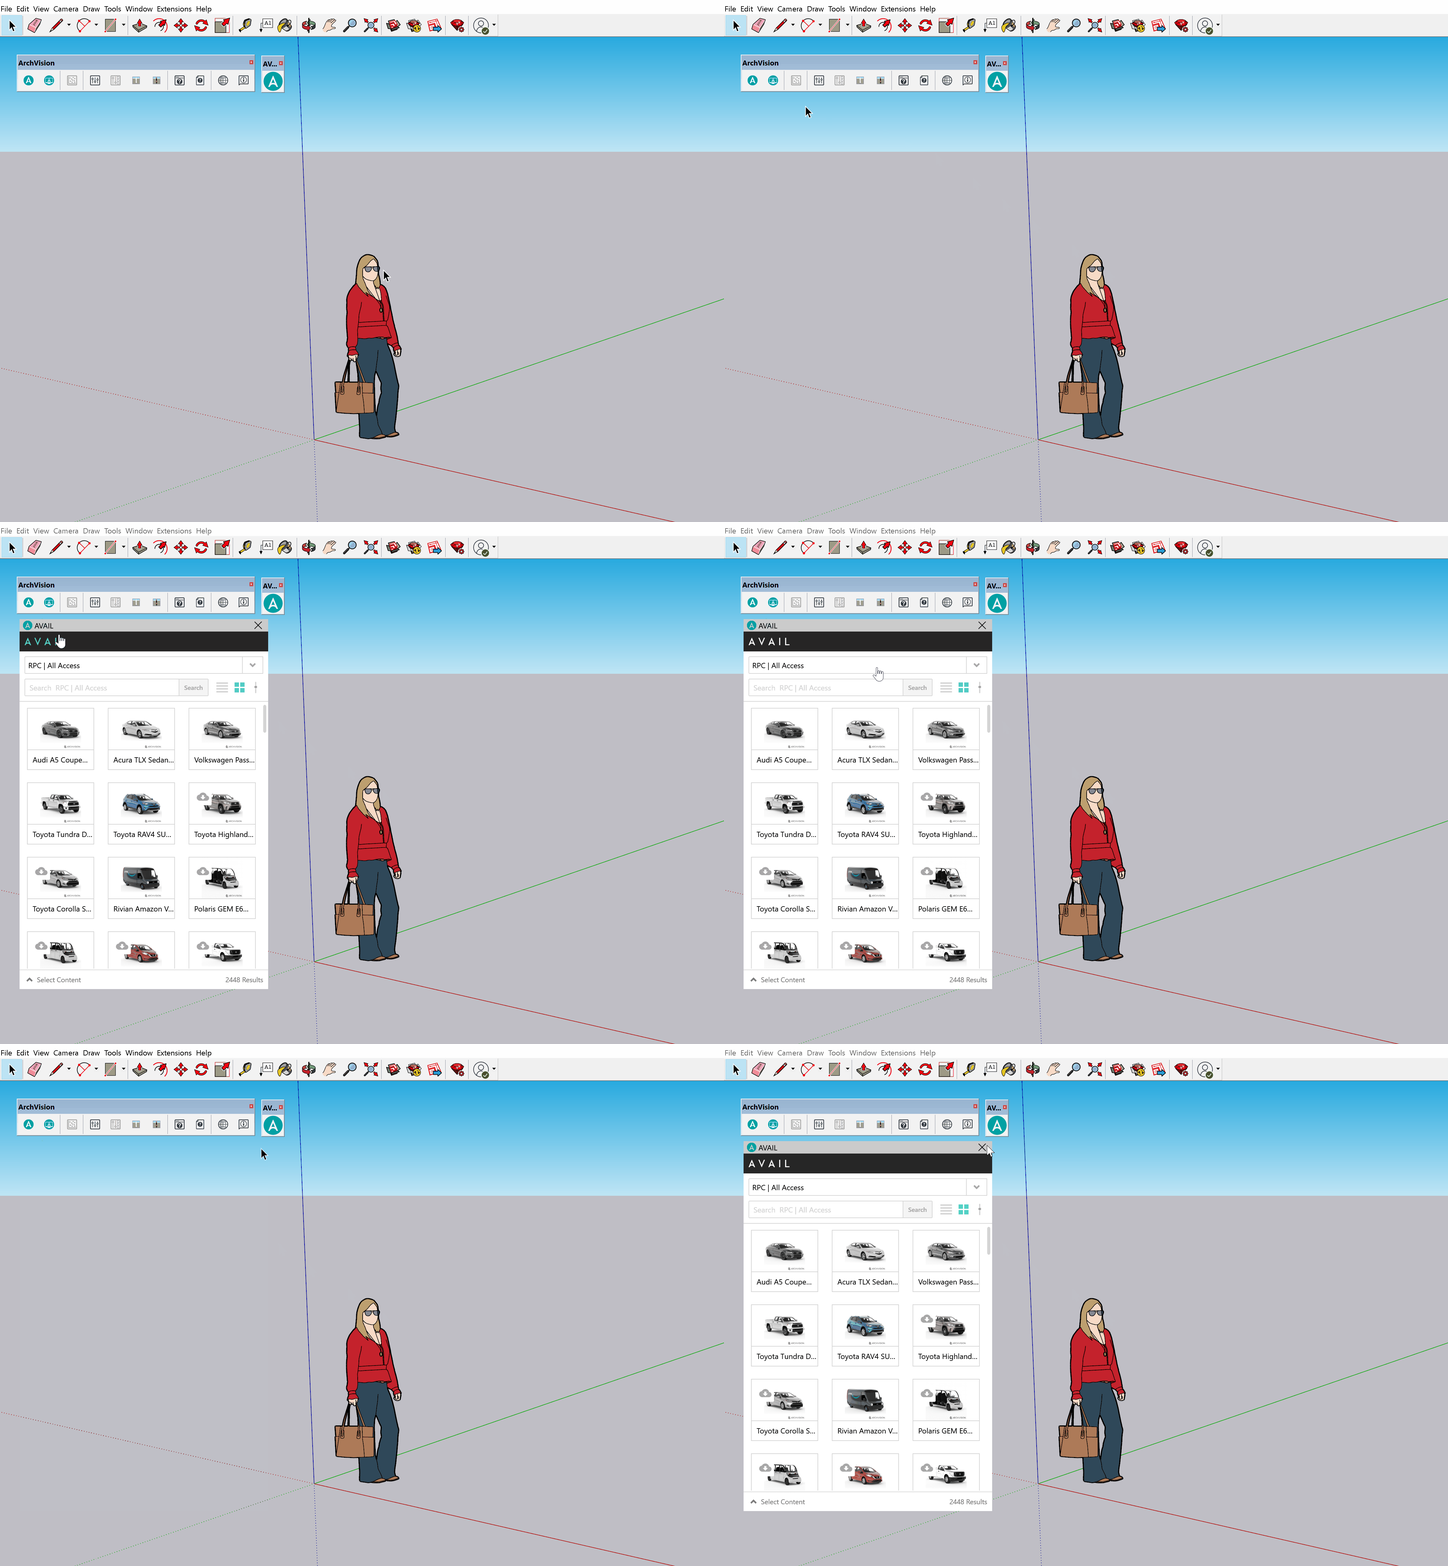
To access all the RPC content it's necessary to open the "AVAIL Browser for SketchUp". To open the AVAIL Browser for SketchUp go to the ArchVision Toolbar and click in the "AVAIL" Icon button located to the right side of the toolbar.
You can also use the AVAIL Toolbar Icon to open the AVAIL Browser.
- Explore and Download the RPC Content
In the AVAIL Browser for SketchUp, Select the Channel you subscribed to (by default RPC | All Access ).
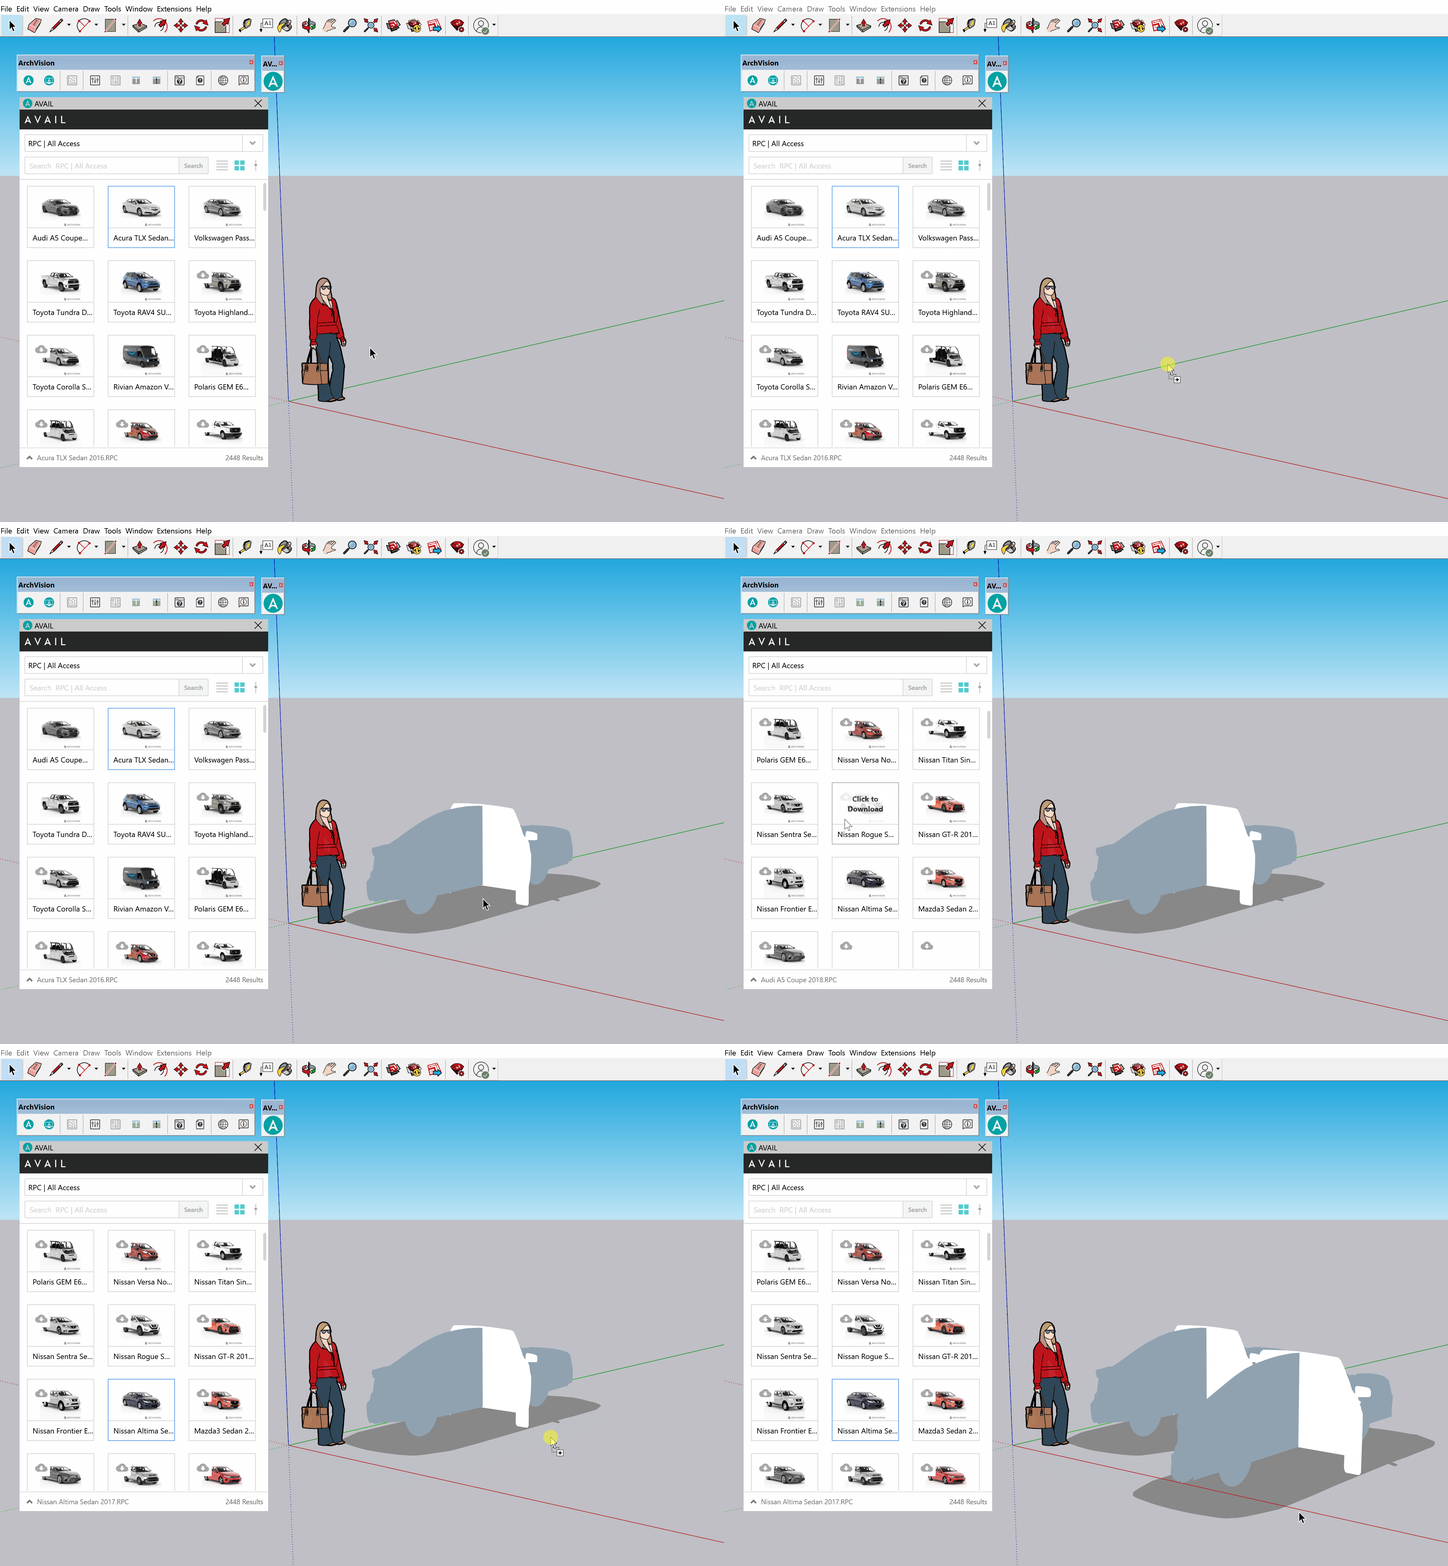
You can scroll down through all the content, or use the search box and type-specific words to filter the content, and select the content you want to download, next click on the "click to download" button to start downloading the asset.
Once the download is completed you can add the RPC content to your project. - Add the RPC Content to your Project (Drag and Drop)
To add the downloaded RPC content to your project, click over the downloaded RPC THUMBNAIL and the drag & drop it into your project, then place the RPC component into your project by clicking on the canvas space in the desired position.
A dialog box with a "Loading Bar" will inform you of the status of the RPC, once the loading process is complete your RPC will be ready to render.
NOTE: SOme RPCs can take longer than others to process based on their complexity, but you can keep adding RPC while a different RPC is still processing,
Hurray!!! Your RPC asset is now available in your project and ready to render.
